How to Apply Wood Veneer: A Beginner's Guide
Applying wood veneer is an excellent way to add an elegant, high-quality finish to furniture or surfaces without using solid wood. Wood veneer offers flexibility, affordability, and aesthetic appeal, making it a popular choice for DIY enthusiasts and professionals alike. Whether you are revamping old furniture or creating new custom designs, applying veneer is a technique that can elevate your project’s overall look. With the proper tools, materials, and techniques, even beginners can achieve professional results.
This guide will walk you through the entire process of applying wood veneer with step-by-step instructions, tips, and techniques to achieve a professional finish. By understanding the types of veneer, the preparation required, and the application methods, you will gain the confidence to transform ordinary surfaces into beautiful, wood-like finishes that can rival solid wood’s aesthetic charm.
What is Wood Veneer?
Wood veneer is a thin layer of real wood, typically between 0.5mm to 3mm thick, that is glued onto a substrate like plywood, MDF, or particleboard. It is used to create a solid wood appearance without the weight or cost associated with solid wood. WoodenAve offers a wide variety of premium veneers that cater to various applications, ensuring high-quality results for any project.
Types of Veneer
Raw Wood Veneer: Unfinished and flexible, requiring an adhesive for application.
Paper-Backed Veneer: Has added stability and is easier to handle.
Pre-Glued Veneer: Comes with adhesive that activates with heat.
Reconstituted Veneer: Made from fast-growing woods, dyed and laminated to mimic expensive grains.
Benefits of Using Wood Veneer
Using wood veneer is cost-effective compared to solid wood, making it a practical choice for projects requiring a premium finish on a budget. It’s also environmentally friendly as it utilizes less timber. Furthermore, wood veneer offers a variety of grains and finishes, providing flexibility in design. Its lightweight and easy-to-apply nature makes it accessible to both professionals and DIY enthusiasts.
Preparing for the Project
Tools and Materials Needed
To successfully apply wood veneer, you will need:
Wood veneer sheets.
Adhesive (such as contact cement or wood glue).
Utility knife or veneer saw.
Straightedge ruler.
Sandpaper (120-grit and 220-grit).
Veneer roller or hard rubber roller.
Clamps (if required).
Masking tape (optional).
Household iron (for pre-glued veneers).
Clear wood finish or sealant.
Surface Preparation
Before applying wood veneer, ensure the surface is clean, smooth, and free of debris. Sand uneven areas to create a flat base, as a smooth substrate ensures a strong bond. Check that the material you’re applying veneer to is compatible; common substrates include MDF, plywood, and particleboard. Lay the veneer sheet on the surface to verify the size and alignment before applying adhesive, allowing you to make adjustments without wasting material.
Choosing the Right Veneer
The choice of veneer depends on your project’s needs. Match the grain and color to the desired aesthetic. Pre-glued veneer simplifies the process with heat-activated adhesive, while raw veneer offers flexibility for custom adhesives and methods.
Methods of Applying Wood Veneer
Iron-On Veneer Application
The iron-on method involves using pre-glued veneers with heat-activated adhesive. This is a quick and straightforward method ideal for smaller projects. A household iron is used to activate the adhesive, bonding the veneer to the surface.
Using Contact Cement
Contact cement is a popular choice for larger surfaces. Both the veneer and the substrate are coated with cement, allowed to dry until tacky, and then joined to create a strong, lasting bond.
Applying Veneer with Glue and Clamps
For those using raw wood veneer, the traditional glue-and-clamp method provides precision and control. Wood glue is applied to the substrate, and the veneer is secured using clamps or a heavy weight until the adhesive cures.
Step-by-Step Guide to Applying Wood Veneer

Step 1: Measuring and Cutting Veneer
Begin by measuring the surface you intend to cover. Use a tape measure to determine the exact dimensions. Cut the veneer slightly larger than the substrate to allow for adjustments during application. A utility knife or veneer saw can be used for precise cuts. Pay attention to the wood grain’s direction to enhance the project’s visual appeal.
Step 2: Adhesive Application
Iron-On Method: Position the veneer on the substrate and apply heat with an iron in circular motions to activate the adhesive.
Contact Cement Method: Coat both the veneer and the substrate with a thin, even layer of adhesive. Allow it to dry until tacky before carefully aligning and pressing the two surfaces together.
Glue and Clamps Method: Spread a thin layer of glue on the substrate, position the veneer, and secure it with clamps or heavy weights until the adhesive sets.
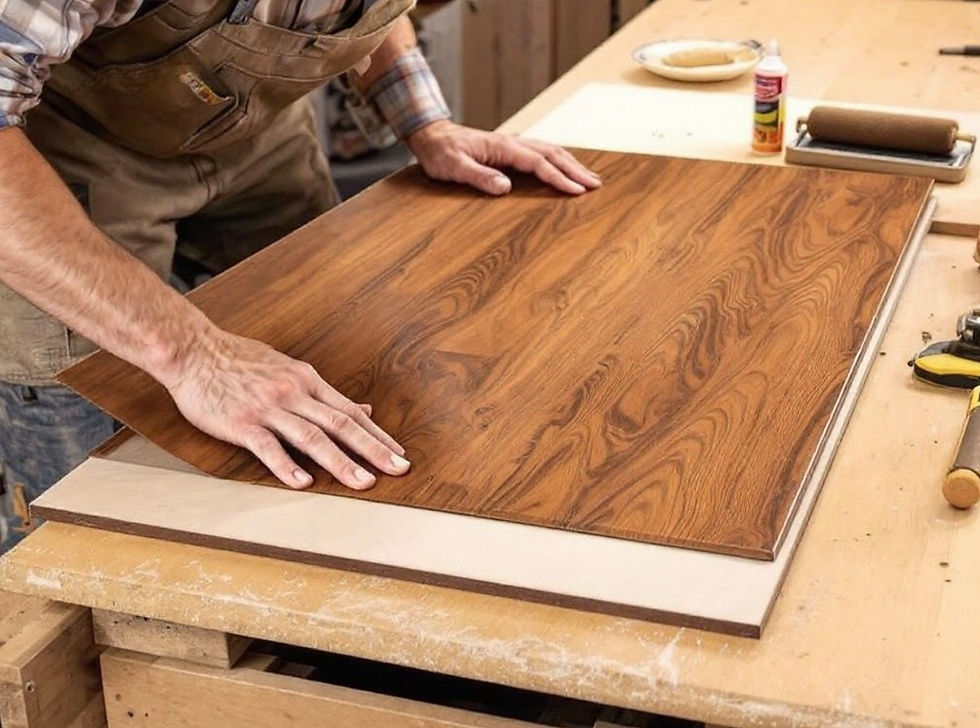
Step 3: Veneer Placement and Bonding
Carefully align the veneer with the substrate, ensuring it is properly positioned. Press the veneer down firmly, using a veneer roller or hard rubber roller to remove air bubbles and ensure even bonding. Apply steady pressure across the surface to create a strong bond.
Step 4: Trimming Excess Veneer
Once the adhesive has fully cured, trim the overhanging veneer edges. Use a sharp utility knife or veneer saw to achieve clean, precise edges. This step ensures the veneer fits seamlessly with the substrate.
Step 5: Sanding and Finishing
Lightly sand the veneer with 120-grit sandpaper to smooth the surface and remove any adhesive residue. Follow up with 220-grit sandpaper for a fine finish. To protect the veneer and enhance its appearance, apply a clear wood finish, varnish, or sealant. This step also ensures durability and resistance to wear.
Tips for a Professional Finish
Avoid Uneven Adhesive Application: Apply adhesive evenly to prevent weak spots or bubbles.
Use Sharp Tools: Sharp tools prevent splintering when trimming veneer edges.
Allow Adequate Drying Time: Don’t rush the process; let adhesives dry fully before moving to the next step.
To maintain your veneer, clean it with a soft, damp cloth, and avoid excessive moisture or direct sunlight, which can cause warping or discoloration. Periodically reapply finish or sealant to keep the veneer looking its best.
Conclusion
Applying wood veneer is a practical and rewarding way to achieve the look of solid wood without the associated cost and effort. By following the steps and tips outlined in this guide, you can create beautiful, professional-quality finishes for furniture, cabinetry, or other woodworking projects. With a little patience and attention to detail, your veneer application can transform ordinary surfaces into stunning pieces of craftsmanship.
